Sewing Lingerie
There are many Lingerie patterns around and lots of people seem to be wanting to try them but are scared to even start. The problem is they look fiddly and the list of haberdashery seems daunting. However if you look again at the instructions you will reconsider . It really is not that difficult to achieve amazing results.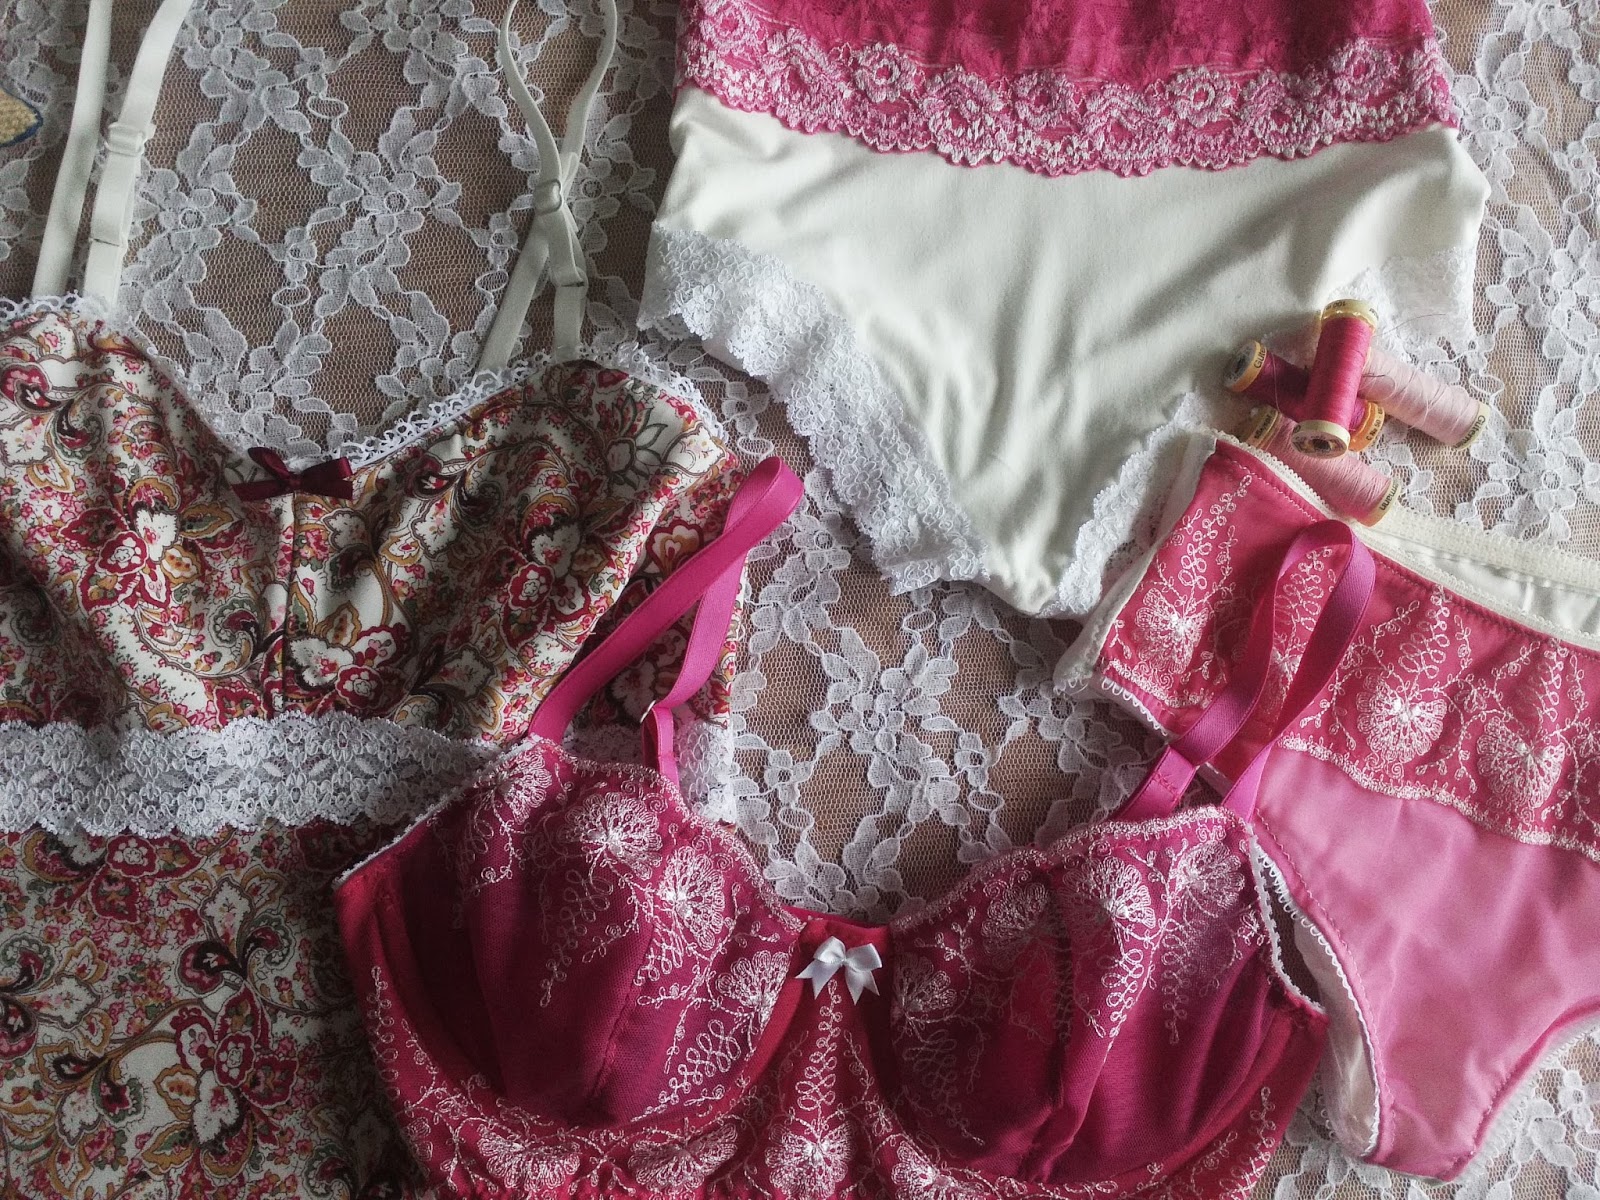
The fabric requirements are as follows,
Viscose fabric for the slip,
The viscose fabric and the cotton jersey for the pants were from MinervaCrafts Viscose dress fabric and Cotton jersey fabric
The stretch laces, elastics powernet and stretch mesh were from my own stash, but they are widely available. Minerva Crafts stock them too.
The bra findings are from Jaycotts.co.uk or MinervaCrafts
Bra underwires
Bra fasteners
Bra accessories
Shoulder strap elastic
Simplicity Underwired Bra and panties pattern
Butterick slip and panties pattern


You will also need underwire casing and matching thread.

Before you start to make your bra take your measurements accurately. There are guides on the best way to do this in the pattern instructions. I would strongly recommend you making a practise garment before you cut into your lace fabric. So, take an old bra and remove the strap rings and sliders, and the back fasters and the underwires. Then make up a practise garment using these odds and ends and a T-shirt you do not want any more and some inexpensive elastic. Do exactly the same for the panties. This will enable you to both test the fit and to practise making these garments if you have never done this sort of sewing before.

It's important that you use the correct fabrics when making a bra. For the underband I used a double layer of stretch scalloped edge lace and powernet. Stick these two layers together with a temporary glue and make them up as one. You will need some stretch mesh for the back.
You also need a ball point needle for your sewing machine These needles slip between the fibres of the fabric, pushing them aside without damaging them, and are available from Jaycotts Ball point and stretch sewing machine needles

As usual on my blog posts I am giving you additional information and tips which are used alongside your pattern instructions, so keep them handy alongside this post.
Start off by cutting your scalloped edge lace. Cut the underband and cups out carefully making sure that you place the scalloped edge along the top of the cups and that the pattern matches on each cup. The design should also be centered on the underband.

This is the cups being pinned together before sewing. Use a fine zig zag stitch throughout and when the instructions say "press" what they mean is use your fingers to smooth out the seam and press it open or to one side. Please do not let an iron anywhere near these fabrics!


For a subtle difference in shades I lined the cups in a purple powernet and the rest of the garment is made in a bright pink.

You will notice that the front band uses the scalloped edge of the lace to full effect, so when you stitch the back on you will need to place it so that there is enough fabric at the bottom for you to turn it under to form a neat hem.
This is also a good time to check the width of your backup fastener and make adjustments as necessary so that it fits perfectly.
The elastic is stitched on the right side of the fabric with the plush side to the inside and the decorative edge pointing downwards. When you turn the elastic to the inside you will top stitch on the right side of the garment leaving the decorative edge showing. The soft (plush) side will then be next to your skin.


This is the bra front showing the careful placement of the design on the lace.

These are the underwires being pushed into the casing.

You will find that the back closures open to enable you to push the bra backs inside them to cover the raw edges. Do stitch twice - You do not want the whole thing falling apart during wear!
Follow the instructions on the pattern for fitting the straps.

This is the finished front of the bra, I finished it off with a tiny bow handstitched to the centre front.

This is the back showing the ensembled straps, the back elastic with its decorative edge and the back fastening.
Beautiful don't you think? And VERY expensive to buy in the shops!
The panties
Making panties is so simple and so quick. Both patterns contain instructions and I made a pair from each.
I made a pair to match the bra first with powenet and lace for the front and cotton jersey for the back. I used the Simplicity pattern as for the bra

For the second pair I used the Butterick pattern and made them in the cotton jersey and stretch lace. Both pairs are made up the same .

Stitch the centre seam and press it open. The gusset must be cut from cotton jersey. Just stitch it in place along the edges, inside the seam allowance then place your strestch lace along the side edges and zig zag it in place without stretching it. Trim the excess fabric away under the lace.

Once the sides are completed stitch the side seam with a French seam. That is - stitch wrong sides together, trim the seam and turn the garment the other way out. Stitch the seam again this time on the inside of the garment.
I added a pink stretch lace to the top for contrast. There is no need for any additional elastic. These will be made in far less than an hour and you can get many pairs out of one small piece of fabric and oddments of stretch lace, making them extremely worthwhile to make .

That's two pair of exceedingly comfortable panties made for next to nothing!
The slip

The slip needs to be cut in the bias if you are not using jersey fabric and the cup needs to be lined with powernet for support. Glue the layers together as before


Overlock or hem the top edge of front skirt and the bottom of the bra top.
Add stretch lace to the top of the skirt on the right side and then to the bottom of the bra again on the right side.
Finish the back by hemming the top and stitching on some elastic - there is a guide to the length needed in the pattern.


Add straps, again the full instructions are in this post Green lace dress and lingerie

You could do a narrow rolled hem on your overlocker instead or a narrow top-stitched hem.


I like these to wear when wandering around in hotel rooms, they are useful under dresses or as nightwear. The powernet under the cup and the elasticated lace under the bust gives plenty of support. The pattern tells you to use rigid fabric or lace for the straps but I prefer bra straps.

This is the back showing the decorative edge of the lingerie lace I used along the top.

These are the finished Bra and panties and I must say that I am delighted with them. I never thought that it would be such an achievable project or that the finished garments would be so beautiful.

I really hope that you are inspired to make yourself at least one set of beautiful lingerie. It is something really special to know that not only did you make
Your dress but you made the matching and perfectly fitting underwear too!
The contact details for Jaycotts is here Contact Jaycotts they are very happy to help you with your questions about their machines and tools.
If you want any help with your sewing then please fill in the contact form on this page and I will get back to you as soon as I can.
Thank you for reading this post
Happy lingerie sewing
#valentinesday #valentine #pink #lingerie #sewangelicthreads #sewer #sewingblog #handmade #bra #knickers #panties #slip #lace